What is a Drill Press?
Written by webtechs

What is a Drill Press?

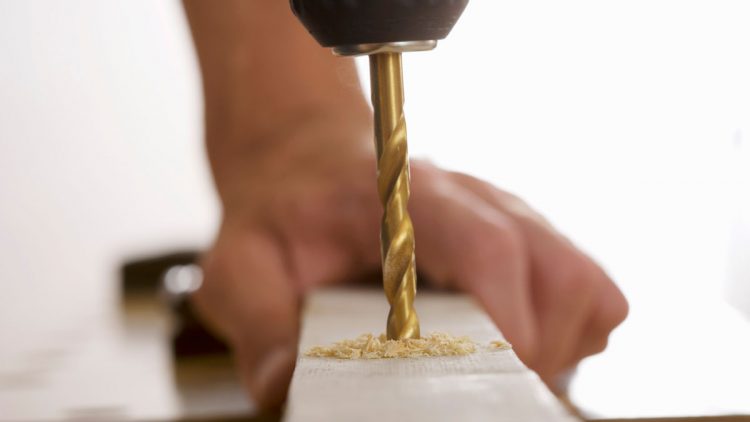
A drill press is a motor driven device intended for boring holes in wood, plastic or metal. Similar to a hand-held drill, drill presses make use of different kinds of bits to create holes of a variety of diameters. Despite that, unlike a hand-held drill, drill presses are bench-top or immobile machines. If you require a drilling device only for minor home repairs and the from time to time, wood working project, a drill press most likely is not right for the task. Nevertheless, if you would like to become serious concerning working with wood or metal, this type of drill is going to make it easier to precisely bore holes, counterbore or countersink those holes and utilize attachments for sanding.

How a Drill Press Works

A full-scale fixed drill press is bulky, somewhat costly and takes up invaluable floor space in your workshop. However, what the drill press lacks in mobility, it makes up for in precision and power. Dissimilar to hand-held drills which rely on physical strength and the stability of the user to drill accurate, clean holes, drill presses are designed to be precise. A rotating handle controls the up and down movement of a spinning device known as the spindle, which is limited to moving vertically. This makes ideally precise holes a lot easier to create. All models utilize a depth stop, for the creation of holes of uniform depth.

How to Choose a Drill Press

A drill press is a considerable investment with some parameters that you should understand to buy the right device for you. The following are the main things to think about when shopping around for a drill press.

Drill Press Type

There are 2 primary kinds of drill presses: bench top models and stationary models. Bench top ones are small-scale, lightweight and more mobile. Stationary models are heavier and are challenging to move, but come with more power, capability and features.

Drill Press Size

Every drill press has 2 primary size elements to think about: swing and spindle travel.

Swing

Swing is the length between the machine’s center column and the spindle, times two. This establishes the utmost width of material you can place on the drill press, when you wish to bore to the center of a work piece.

Spindle Travel

Spindle travel comes down to how deep your drill press can descend as you turn the handle. Benchtop models may only allow 2 or 3 vertical inches of downward travel, whereas the best full-sized models can move 5 or 6 inches.

Drill Press Power

The best way for judging the power of a drill press is by calculating its wattage. All models show volt and amp figures on the electrical nameplate. Multiply these together and you come up with watts. The higher the wattage, the more powerful the device and the more difficult materials through which it is going to be able to bore.

The biggest demo-model drill presses for DIY workshops provide around 1,000 watts of power. Work surface models usually have 1/3 to 1/2 this power.

Drill Press Speed

Many drill presses have adjustable rotation speeds for effectual drilling in various materials. Higher-end models provide more speeds. Work surface models usually provide 5 or 6 speeds, whereas a good demo model might have upwards of 16. Why does rotation speed an issue? The more solid the material you are boring, the slower the drill bit rotation speed you require.

Features of a Drill Press

The table of a drill press is where the work piece is going to sit, and on just about every model the table can move up and down making room for your work piece. A lot of models also allow sideways tilting of the table, either to 45 degrees or, for larger, higher-end ones, a complete 360 degrees, enabling drilling at every angle. Some models come with laser guides or LED lights to show precisely where your hole is going to land.

Woodworking Supplies Mesa by Timber Woodworking

Timber Woodworking offers hardwoods in Mesa, Arizona. We specialize in woodworking tools, equipment, and supplies for commercial woodworking cabinet shops or furniture manufacturers as well as the home shop hobbyist. Contact us today, or call if you should have any questions.

Types of Woodworking Clamps
Written by webtechs

Types of Woodworking Clamps

When choosing the proper tools, it is vital to consider the kind of work you plan on doing and the type of material you are going to be working with. Various types of clamps can be classified into several basic groups, which differ depending on the material and the technique of use. Each of these types can come in a multitude of varieties and can be used for a lot of purposes outside of their primary intended use.

Woodworking F Clamps

Traditional woodworking F clamps are the most general and widely used kind of clamping device. It’s used by just about every woodworker and is appropriate for any situation in which two items must be clamped together. It’s a perfect addition to any workshop and is useful for projects outside of just woodworking.

F clamps are typically available in lengths running from 150 mm to 1 meter. The jaws have plastic covers for protecting the workpiece from any damages. They provide profiled cast iron arms connected to a steel bar. The handles have a coating with a light but secure silicone layer, referred to as Soft-Grip, to guarantee a better grip throughout use. Additionally, you aren’t going to feel the need for using too much force to stop your hand from slipping, unlike conventional wooden handles.

One-Handed Quick-Release Clamps

Quick-release bar clamps are an excellent device when two hands are simply not enough. It comes convenient for the attaching of individual pieces, to secure materials to the bench, a pillar drill, a device’s guide rail and to other apparatuses, in which you need to handle with just one hand. It performs its function instantly and without requirement for adjustments.

The one-handed quick-release clamp is the quickest device for securing a work piece. These tools are specially designed for clasping workpieces; nevertheless, they are not correct for joining large surfaces and huge materials to one another. It is necessary not to forget that if you clamp work pieces over a long time, the clamping tension might be reduced. Consequently, it is recommended to replace them using parallel jaw clamps.

Quick Lever Clamps

The lever clamp is recognized for its easy clamping system. It has a durable all-metal body and robust construction, which eliminates worry about damage or wear, dissimilar to plastic one-handed clamps. Additionally, you have two kinds of these ideal and, in a lot of cases, unrivaled helpers at your disposal.

The range of lever clamps is especially notable for its compatibility with guide rails from favorable brands, like Makita, Stanely Black & Decker, Bosch, Dewalt, etc., as their jaws can be entered into a 12 mm guide T-slot. In addition, the quick lever clamps are convenient for securing work piece to a workbench. Providing ideal performance, and due to their plastic covers, stop damage to the clamped workpiece.

Face Clamps

The face clamp is a specialized device characterized by compatibility with assembly jigs and pocket holes. When these convenient devices are a part of your workshop, this type of clamp is a vital addition that you are going to probably find essential.

In addition, without these jigs you can benefit from the face clamp’s features, like its big clamping pads retaining workpieces straight. The smooth pressure management and the capacity to tweak it using a screw are especially useful. It is perfect for working with fragile materials without the risk of damaging a workpiece.

Pipe Clamps

In comparison to parallel clamps, pipe clamps provide a considerable advantage: you are only restricted by the length of the steel plumping pipe. When that is not enough, combine the two. Screwing one part of the jaws onto the steel pipe with a 27mm diameter and a G 3/4″ BSP thread, whereas the other jaw enters onto the opposing end of the pipe. The clamp is now ready for use. The jaws come equipped with feet that provide better stability and execution. The entire structure is made out of cast iron with clamping by a huge handle.

Spring Clamps

Spring clamps are not clamps in the conventional sense. It is adaptable and operates with a very light grip, making it almost like clothespins. Use it for fast and easy clamping of smaller work pieces, like differing slats or decorative moldings, in which high clamping pressure is not needed, and extreme pressures could cause damage.

Even with its gentle operation, the spring clamp is highly robust. The strong, heat-treated steel spring can withstand almost any use devoid of leaving pressure blemishes or causing other types of damage. The swiveling pads can help to better clamp work pieces, and the rubberized handle stops the device from slipping out of your hand.

Woodworking Supplies Mesa by Timber Woodworking

Timber Woodworking offers hardwoods in Mesa, Arizona. We specialize in woodworking tools, equipment, and supplies for commercial woodworking cabinet shops or furniture manufacturers as well as the home shop hobbyist. Contact us today, or call if you should have any questions.
The Importance of a Good Workbench
Written by webtechs

The Importance of a Good Workbench

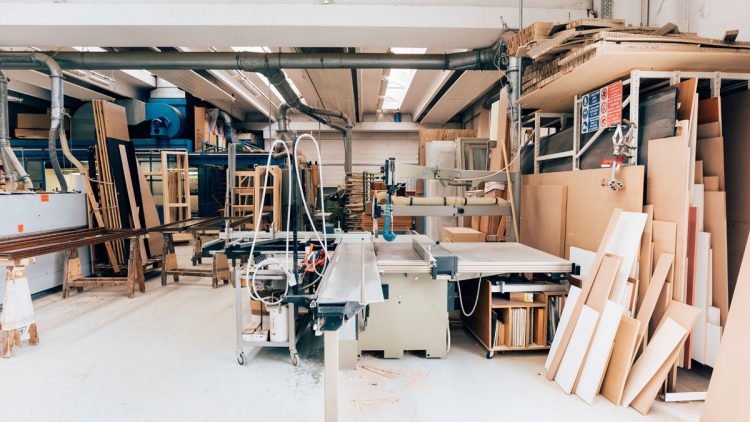
In woodworking, a solid workbench is important. It doesn’t matter if you’re a beginner or a seasoned pro, a dependable work bench is the cornerstone for any successful woodworking project. It supports your work, keeps your tools organized, and improves precision and safety.

The Role of a Workbench in Woodworking

A workbench is more than just a surface, it’s the heart of your work area. It provides balance for sanding, sawing, and assembling, assisting you to work with precision and ease. A well-designed work bench refines workflow, encourages safety, and elevates your woodworking experience.

Why a Good Workbench is Vital

A sturdy workbench guarantees durability, which is essential for accurate measurements and dependable assembly. It aids in organizing your tools, making your workspace structured and safe. Built-in features such as vises or clamps offer extra functionality, making your undertakings easier and more delightful.

Types of Workbenches

Workbenches come in different styles, from mobile to standing models. Some offer adjustable heights, storage areas, or built-in jigs to improve efficiency. No matter if you need a conventional hardwood bench or a compact, foldable alternative, the proper workbench is going to meet your particular needs.

Choosing the Right Workbench

When selecting a workbench, think about aspects such as height, surface area, and special characteristics. Ergonomics are vital for comfort, whereas tool storage and work surface size affect your overall performance. A thoughtful decision is going to make your projects more undemanding and more productive.

Setting Up Your Workbench

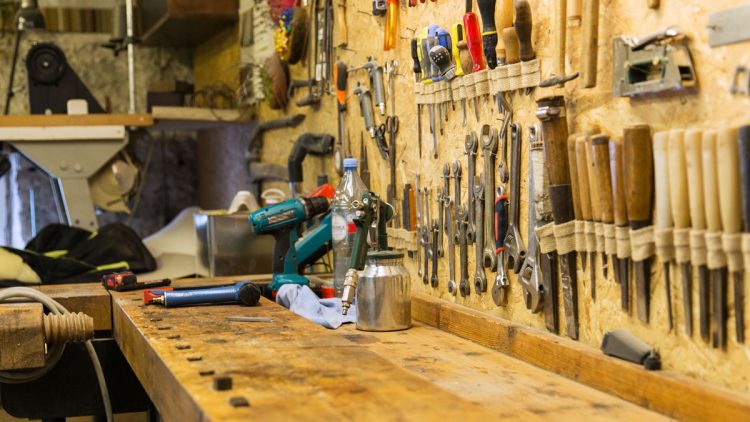
To refine your workspace, keep tools organized and easily within reach. Wall-mounted storage or peg-boards can help make space available, whereas labeled bins keep materials orderly. Regularly clean and maintain your work bench to guarantee it remains a functional and safe focal point of your workshop.

Maintaining Your Workbench

Maintaining your workbench increases its lifespan and keeps your work area safe. Clean the surfaces following every use, apply finishes from time to time, and examine for wear and tear. A well taken care of work bench encourages quality work and a more delightful woodworking experience.

Frequently Asked Workbench Questions

Below are some frequently asked workbench questions:

What is the importance of a good workbench for woodworking?

A good workbench provides a stable, level surface when cutting, sanding, and assembling projects. Attributes such as clamps and vises make it easier to retain and work with materials.

What should I look for in a workbench?

Look for a durable, stable workbench with a level work surface, clamps or vises, and enough space to work smoothly. Height is vital for usability and comfort throughout long projects.

Can I build my own workbench?

Absolutely, building your own workbench allows you to customize it to fit your work area and particular needs.

What are the advantages of a well-organized workbench?

An organized work bench helps you locate tools faster, decreases clutter, and improves safety by averting accidents and enhancing efficiency.

How do I maintain my workbench?

Clean your work bench routinely, oil moving parts, and examine for stability. Correct maintenance guarantees longevity and optimizes performance.

Woodworking Supplies Mesa by Timber Woodworking

Timber Woodworking offers hardwoods in Mesa, Arizona. We specialize in woodworking tools, equipment, and supplies for commercial woodworking cabinet shops or furniture manufacturers as well as the home shop hobbyist. Contact us today, or call if you should have any questions.
What is Woodworking?
Written by webtechs

What is Woodworking?

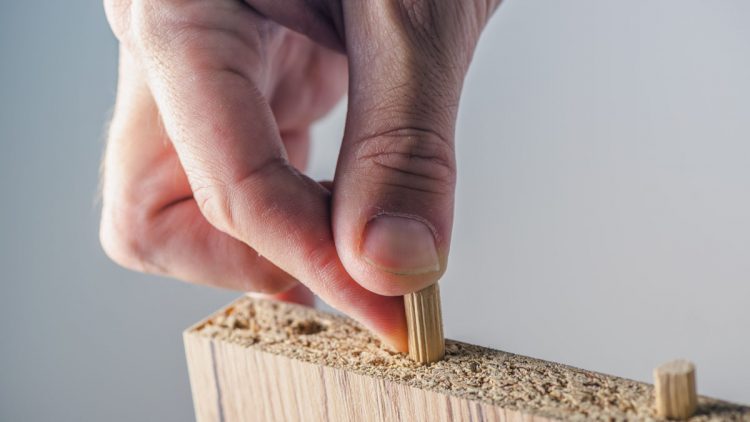
It’s the creation of objects from wood by use of hand or power tools. Woodworking is more varied than it initially seems – it comprises of everything from rustic green woodworking to complex and precise cabinetry. Carpentry is the designation given to this activity by a lot of people, however, in the industry this refers more to the construction of woodwork in housebuilding which is typically done on site. People that make doors and windows and similar objects are known as bench joiners and are typically based in workshops. An able bodied woodworker knows the ways to get the best out of various materials, from natural timber to chipboard or strand board. It’s not only about skill with tools but also design and planning.

Woodworking Scenarios

Wood is such a malleable material, with the simplest of tools, it would have been one of the main things humans used for creating shelter and tools. There’s a wide range of tree types, which come in various grades and for a lot of traditional work is required to be dried to hinder movement following it has been worked. Each craft has their own specialized tools – for instance chair makers have travishers used to hollow out chair seats making them more comfortable, and woodcarvers have a wide range of gouges for cutting various shapes. Woodworking methods allow us to create things as varied as homes, furniture, boats, shelves, animal housing, doors, work-benches, utensils, frames for picture, children’s toys, containers and a whole lot more.

Skills of Woodworkers

Woodworking includes a large quality range too – a piece of work can be joined together with just nails, or complex joints; wooden structures in houses are typically held together with nails and wood screws, however, a chair or an older house might contain tenon and mortice joints. Skillful woodworkers use a range of various joints for various scenarios, to resist the various forces exerted on the finished piece. Instances of joints comprise of mitre, mortice & tenon finger, bridle, box, housing, butt, dovetail, tongue & groove, halving or lapping joints. Some joints are carried out with simple hand tools, and others necessitate power tools – like domino or biscuit joints, which are intended to save time and are very robust.

What Are the Benefits Of Woodworking?

  • It’s about utilizing a biodegradable, renewable, and non-toxic source – wood – for creating useful, eco-friendly and healthy items for you, your family and your friends.
  • Hand-made items are unique and attractive, and they make perfect presents.
  • Woodworking skills allow you to perform repairs on your home.
  • Woodworking is beneficial for you – it’s a therapeutic, meditative, gratifying hobby or career, it’s great exercise and can save you money.
  • If you’re really skillful (and proficient), you could think about starting a small business and help take away some money from the omnipresent flat-pack giants.
  • The exercise and environmental benefits are higher when you are using hand tools – lower personified energy and no electricity required, simply muscle power.
  • The environmental benefits are even greater when those hand tools are “new” to you; a lot of old tools are made of very high-quality steel, unparalleled by tools of the same price today.
  • Wood is very endurable; wooden objects can last multiple lifetimes if they’re well-made, and solid wooden furniture is easily repaired. There’s great joy to be had from making objects that can be passed down through the generations; however, even if they come to the end of their lifespan, they can be recycled or used as firewood, instead of going to a landfill.
  • It can encourage demand for local timber, and consequently tree-planting.
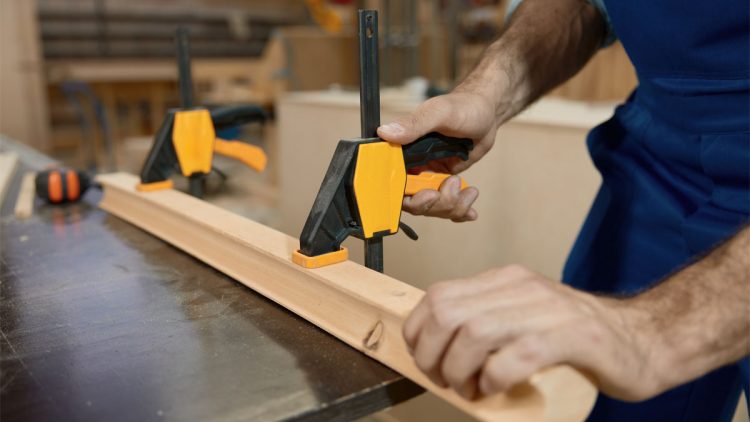
  • Clamps: there can never be enough, and there are several kinds – sash clamps are long metal bars with a changeable shoe; they could be made of aluminum (low cost and light) or T-section iron (heavy and durable). G-clamps and Sash clamps (that attach onto the piece) apply high-pressure, and F-clamps and fast-grip/operation clamps (a modern advancement of the F-clamp) come with rubber heads that won’t blemish the work and are quick-release and low-pressure.

Woodworking Supplies Mesa by Timber Woodworking

Timber Woodworking offers hardwoods in Mesa, Arizona. We specialize in woodworking tools, equipment, and supplies for commercial woodworking cabinet shops or furniture manufacturers as well as the home shop hobbyist. Contact us today, or call if you should have any questions.
Types of Hardwoods
Written by craig braddick

Is Maple Considered a Hardwood?

Why Is Maple Considered a Hardwood?

✔️ Hardwood vs. Softwood: Hardwood comes from deciduous trees (trees that lose their leaves in winter), while softwood comes from evergreens. Since maple trees are deciduous, they are classified as hardwood.

✔️ Janka Hardness Scale: Maple ranks high on hardness—especially hard maple (sugar maple), which has a Janka hardness rating of 1,450 lbf (pounds-force), making it one of the harder domestic woods.

Types of Maple Wood

1️⃣ Hard Maple (Sugar Maple, Rock Maple)

  • Very dense & strong
  • Used for furniture, flooring, butcher blocks, and bowling alleys
  • Lighter color with a fine, even grain

2️⃣ Soft Maple (Red Maple, Silver Maple, Bigleaf Maple)

  • Softer than hard maple but still durable
  • Easier to work with for cabinetry, musical instruments, and turning projects
  • More variety in color and grain

Is Maple Good for Woodturning? (Since You’re Turning Bowls & Spindles 😉)

Hard Maple: Tougher, great for durable bowls but can be harder on tools.
Soft Maple: Easier to turn, still strong, and takes stain well.

👉 Tip: If you’re turning bowls, soft maple is often preferred for its smoother cutting, but hard maple polishes beautifully and is great for high-end pieces.

Best Uses For Maple Wood

Best Uses for Maple Wood 🌳🔨

Maple is a versatile, strong, and durable hardwood, making it popular for a variety of woodworking projects. It comes in hard maple (sugar maple) and soft maple (red, silver, or bigleaf maple), each with unique characteristics.

1. Furniture 🪑

✔️ Hard maple is dense, durable, and resistant to wear, making it ideal for:

  • Dining tables & chairs
  • Dressers & cabinets
  • Desks & bookcases
  • High-end custom furniture

👉 Why? It’s long-lasting, resists scratches, and has a smooth, even grain for a refined look.

2. Flooring & Stairs 🏡

✔️ Hard maple is a top choice for:

  • Hardwood flooring (especially in high-traffic areas)
  • Stair treads & railings

👉 Why? Maple is dense and durable, making it resistant to dents and scratches, plus it finishes beautifully.

3. Wood Turning & Carving 🌀

✔️ Both hard and soft maple are great for turning!

  • Bowls
  • Spindles
  • Tool handles
  • Decorative carvings

👉 Tip for You (Since You’re Into Woodturning! 😉)

  • Soft maple is easier to turn and takes stains well.
  • Hard maple polishes beautifully but is tougher on tools.

4. Cutting Boards & Butcher Blocks 🔪

✔️ Hard maple is the gold standard for food-safe surfaces like:

  • Cutting boards
  • Butcher blocks
  • Rolling pins & utensils

👉 Why? It’s non-porous, resists bacteria, and won’t dull knives as quickly as some other woods.

5. Musical Instruments 🎻🎸

✔️ Hard maple is commonly used in:

  • Guitar necks & bodies (Fender Stratocasters often have maple necks!)
  • Violin backs & sides
  • Drum shells & drumsticks
  • Piano frames

👉 Why? It has great acoustic properties—clear, bright tones with excellent sustain.

6. Cabinetry & Millwork 🚪

✔️ Maple is often used for:

  • Kitchen cabinets
  • Trim & molding
  • Doors & paneling

👉 Why? Its smooth grain takes stains and paint well, making it great for both natural and finished looks.

7. Sports Equipment 🏀🏒

✔️ Maple’s toughness & shock resistance make it ideal for:

  • Bowling lanes & pins
  • Baseball bats (many MLB bats are hard maple)
  • Hockey sticks
  • Gymnasium floors

👉 Why? It’s impact-resistant and holds up to heavy use.

Final Thoughts: Why Choose Maple?

Extremely durable & strong (especially hard maple).
Beautiful grain—can be left natural, stained, or painted.
Versatile—great for fine furniture, floors, turning, and more.
Readily available—a top choice for both professionals & hobbyists.

Hardwoods Mesa by Timber Woodworking

Timber Wood Working offers hardwoods in Mesa, Arizona. We specialize in woodworking tools, equipment, and supplies for commercial woodworking cabinet shops or furniture manufacturers as well as the home shop hobbyist. Contact us today, or call if you should have any questions.
Woodworking Tools
Written by craig braddick

Using A Table Saw

The most expensive table saws, which range from $700 for a contractor-grade model to $300 for a standard model, are sold by the size of the blades they can use. Most table saws are 10 inches, which is the best size for most carpentry and woodworking jobs. However, 8-inch table saws are good for small jobs, and 12-inch table saws are great for making deeper cuts in thicker materials. The following are parts of a table saw:

When you use a table saw, be careful.

Too many amateurs and professionals have hurt themselves badly because they don’t know how to use a table saw. The material being cut can get stuck and kick back if it is not handled properly. This can either throw the material at the person cutting it at high speed or jerk it violently and pull their fingers toward the blade. Here are some things you can do to lower the chance of kickback:

Don’t turn on the saw if the thing you want to cut is touching the blade.
When you make “rip” cuts, you should always use the rip fence.

For crosscuts, you should always use the miter gauge instead of the rip fence because the rip fence doesn’t provide enough support.

During the cut, make sure the material is flat against the table.

Take the time to read the manufacturer’s safety instructions and make sure to always wear goggles and ear protection when using the table saw. This will help prevent kickback. Take the saw off the power before you adjust or align the blade, and don’t take off the safety guards that came with it.

Getting Ready to Cut

You can make dado cuts, compound angles, and rabbet joints with table saw accessories like clamps, stops, and jigs. But woodworkers mostly use the table saw for two basic cuts. The most common way to use a table saw is to rip, which means cutting things to a certain width. Crosscutting is a way to cut things to a certain length. The steps below will show you how to make each of these common cuts with a table saw.

How to Use a Table Saw

The rip fence on a table saw lets you make the easiest cut by adjusting to the width of the cut you want. It also acts as a guide to help you keep the material steady while you cut.

First, get the saw ready.


Take the table saw off the power and put a rip blade that works with the material you want to cut into the blade arbor on top of the table. Change the height of the blade so that it doesn’t stick out more than ¼” above the material you’re cutting. If you want to cut long pieces of wood from ½” plywood, for example, don’t raise the blade more than ¾” above the table.

To do this, loosen the arbor nut (the nut that holds the blade in place) with the arbor nut wrench that came with your table saw. Then, put the rip blade on the table saw so that the teeth face the front of the machine. From the top down, a table saw blade spins toward you. This means that the sharp blades should face the front of the table saw and not the back. Make sure the arbor nut is tight.

Step 2: Put the fence in place.

To set up the rip fence, first release the locking lever on the front of the fence. This locks the fence in place, and then slide it so that the inside edge matches the cut width you want. There is a ruler on the front of your table saw to help you set up the fence, but don’t use it alone to measure your cut. How far is it from the fence to the edge of the saw blade tooth that is closest to you? Use a precise tape measure. There are two sets of teeth on a saw blade. One set faces left and the other faces right. If you measure to the closest edge, you’ll know how much wood the blade will remove during the cut. This is called the kerf.

Step 3: Put the wood in place.

Place the material to be cut on the table saw so that it lines up with the rip fence. Do not let the material touch the blade until the saw is fully on and the blade is moving at full speed. Before the blade can start cutting, the material must touch it. This will definitely cause kickback.

Step 4: Move the wood through the saw.

Slowly but firmly move the material along the rip fence with one or both hands, depending on how much control you need to keep the material flat on the table top and in line with the fence. When ripping big, thick boards, you should usually start by guiding the material with both hands and then switch to one hand as the cut gets closer to being done. Always keep the material flat when you cut it if it’s long and goes past the back of the table. You can use a table extension to support it or have someone help you support it. Don’t let go of the material as you walk around to the back of the table saw. If you do, the material could lift off the table, which would make kickback more likely.

Step 5: If you need to, use a push stick.

If you need to keep your fingers away from the moving blade, use a push stick. When you’re making narrow rips that put your fingers just a few inches from the blade, a push stick is there to help guide the material. Always use a push stick instead of taking a chance.

How to Use a Table Saw

How to Cut in Half

It’s important to remember not to use the rip fence as a guide when cutting cross-cuts on a table saw. Long pieces are kept stable by the rip fence, but most crosscuts are made on thin materials, like when you cut something in half or remove the end of a board. When crosscuts are being done, there isn’t enough material to fit along the rip fence, so trying to use it increases the risk of dangerous kickbacks. Use a miter gauge instead.

A miter gauge has a bar that fits into one of the deep grooves on the table’s surface and a guide fence that keeps the piece stable. The miter gauge slides from the front to the back of the table saw when the bar is in a groove. This lets you control the cut. A guide that looks like a protractor can be adjusted by loosening a knob and then choosing the right angle before tightening the knob again. There are times when the miter gauge that comes with a table saw is a bit light. If you’re going to be crosscutting a lot, you might want to buy a stronger aftermarket miter gauge. You can also use a miter sled (see “Note” below).

1. Turn off the power to the table saw and put a crosscut blade in the arbor, just like in Step 1 of “How to Rip.”

2. Change the miter gauge’s protractor guide to make crosscuts that are either straight or mitered, which means they are at an angle.

3. Place the material along the front edge of the miter gauge and make sure it is straight. If you need to, use clamps to hold it in place.

4. Connect the table saw to the power and turn it on. Do not put any wood on the blade until it is spinning at full speed.

5. Put the material you’re cutting and the miter gauge together very carefully and slowly move them through the moving blade.

6. Turn off the table saw before getting things that were cut off close to the blade.

Important: You might want to buy an extra miter sled to help hold your material steady while you crosscut it. A miter sled looks like a shallow rectangular box with slots already cut out of the bottom. You can place the material inside the sled and then slide the whole thing over the table to cut. There’s no need for you to buy one, though. There are free, detailed plans online that you can use to make your own miter sled. You could use your new table saw to make a miter sled as your first project.

We specialize in woodworking tools, equipment, and supplies for commercial woodworking cabinet shops or furniture manufacturers as well as the home shop hobbyist. Contact us today, or call if you should have any questions.

Woodworking Tools
Written by craig braddick

Buying A Used Table Saw

Buying a Used Table Saw: What to Look For & Tips 🛠️🪵

A table saw is one of the most essential tools for woodworking, and buying a used one can save you a lot of money—but only if you get a good deal! Here’s a checklist to help you find the best used table saw and avoid costly mistakes.

1. Decide What Type of Table Saw You Need

🔹 Jobsite/Tabletop Saws → Portable, lightweight, for DIY & small jobs.
🔹 Contractor Saws → Heavier, better for serious woodworking & furniture making.
🔹 Cabinet Saws → Heavy-duty, precision cuts, great for professional shops.
🔹 Hybrid Saws → A mix of contractor & cabinet saws, good for advanced hobbyists.

👉 Pro Tip: If you need precision and power, go for a contractor or cabinet saw. If you need portability, a jobsite saw is best.

2. Inspect the Saw’s Condition

🔧 Essential Parts to Check:

Tabletop & Fence → Should be flat, smooth, and free of deep rust or warping.
Blade Arbor & Bearings → Spin the arbor; it should feel smooth with no wobble.
Motor & Belts → Run the saw if possible. Listen for strange noises. Look for belt cracks.
Rip Fence & Miter Gauge → Should slide easily and lock firmly.
Blade & Inserts → Worn blades aren’t a dealbreaker, but good ones are a bonus.
Gears & Adjustments → Tilt and height adjustments should move freely without stiffness.

3. Test the Saw (If Possible)

🔹 Run the saw to check:
✅ Smooth startup (no delay or struggle).
✅ Consistent blade speed (no excessive vibration).
✅ Fence alignment & cut accuracy.
✅ Noise level (loud grinding or knocking sounds = problems).

⚠️ Red Flags:
🚨 Blade wobbles while running.
🚨 Fence doesn’t lock squarely.
🚨 Burn marks on test cuts (could mean a dull blade or motor issues).

4. Check for Safety Features

✔️ Blade Guard & Riving Knife → Helps prevent kickback.
✔️ Anti-Kickback Pawls → Should be intact and functional.
✔️ Emergency Shutoff Switch → Should be easy to access.

👉 If safety features are missing, you may need to replace them, which can add cost.

5. Research the Brand & Model

🔎 Look up the saw’s brand, model, and reviews online.
🔎 Check if replacement parts are available.
🔎 Popular, reliable brands include:

  • SawStop (best safety tech)
  • Powermatic (high-end, durable)
  • Delta (solid contractor saws)
  • Jet (great for serious woodworkers)
  • DeWalt, Bosch, Makita (good portable/jobsite saws)

6. Negotiate the Price 💰

🔹 Used table saw prices vary based on type & condition:

  • Jobsite/Tabletop Saws: $100–$500
  • Contractor Saws: $300–$1,200
  • Cabinet Saws: $800–$3,000
  • Hybrid Saws: $500–$1,500

📌 Tip: If repairs are needed (blade, fence, belts), use that to negotiate a lower price.

7. Where to Buy Used Table Saws

🔹 Facebook Marketplace, Craigslist, eBay – Best for local deals.
🔹 Estate Sales & Auctions – Often have great bargains.
🔹 Tool Shops & Woodworking Forums – Sometimes offer refurbished models.

Final Thoughts: Is It Worth Buying Used?

✅ If the saw runs well, is solidly built, and has available parts, a used table saw can be a great deal.
❌ If it’s missing critical parts, makes odd noises, or has a wobbly arbor, it’s not worth the hassle.

We specialize in woodworking tools, equipment, and supplies for commercial woodworking cabinet shops or furniture manufacturers as well as the home shop hobbyist. Contact us today, or call if you should have any questions.
What is a Router
Written by craig braddick

How To Use A Router

Routers are a type of power tool that is mostly used in joinery, woodworking, and carpentry to make things like cabinets and furniture. They are most often used for working with wood, but they can also be used on plastic and some other soft materials.

What Does A Router Do?

A router spins quickly to cut, shape, and trim wood to make edges and corners that are perfectly finished. Routing a piece of work improves its overall design.

Most of the time, they are used to make patterns in wood, like rounding off the edges of worktops, drawing on picture frames and cabinets, and a lot more. In this way, they raise the bar for plain wooden edges.

You might not believe it, but wood routers do more than just cut and shape wood. You can make dadoes, rabbets, and other shapes.

Step by Step Instructions on How to Use a Router

Step 1: Make sure the tool is off and turn it over so that the router bit fits.
Step 2: Change the depth of your router based on the type of router you have and the job you need to do.
Step 3: If your router has more than one speed, set it to the right speed for the job.
Step 4: If you can, hook up a dust extractor.
Step 5: For a smoother process, start cutting in the opposite direction of the plane’s spin.
Step 6: For hand-held routers, feed from left to right.
Step 7: Feed from right to left on router tables

How to tell a router what its depth is

You can change how deeply the router cuts into the material and how much material is removed by changing the depth. The way you do this will depend on the type and brand of router you have, but it’s pretty simple and will be explained in your manual. If you want to change the depth of a plunge router, all you have to do is use the depth stop scale to move the tool to the right depth for your cut. Fixed base routers stay at the same height during the whole cut. The trimmer base is all that is needed to change them.

How to use a router for wood

If your router has more than one speed, the next step is to set it to the right speed for the job. You can find this in the instructions. After that, you can connect it to your dust extractor if it can do that. Since routing can make a lot of dust, this is always a good idea if you plan to do it a lot. The router is now ready to be turned on and used.

Since router bits spin in a clockwise direction, it’s best to go against the clock when routing the top of a piece of work. The router is coming at you from this angle, which gives you more control and accuracy. The wood does tend to chip when this method is used, though. This could happen, so go backwards and clockwise for a few inches. For edges, move the router the other way from the way the bit is spinning (see below).

For hand-held routers, feed from left to right.

When feeding router tables, go from right to left.

You should always go the opposite way of the cutter’s spin. The bit will be able to glide more easily, which will make the process go more smoothly and give you the best results.

If you have never used a router before, you can always try it out on some scrap wood first. A parallel guide is an important part of most routers that makes sure plunge cuts are perfectly straight.

Which router bit to use

There are a lot of different kinds of router bits and cutters out there. To get clean routed edges, you need to use a sharp, good router bit.

Here is a list of some of the most common router bits and what they are used for. You can also look at the diagram to get a better idea of the cuts that these router bits will make.

Types of router bits:

One type of router bits that is used a lot is the straight router bit. They cut the material straight through to hollow it out so that grooves or dadoes can be made. People also like to use straight router cutters to carve letters, numbers, and other shapes into wood. This is where your parallel guide will come in handy for making straight cuts. To engrave, just draw the shape, letter, or number you want to use on the wood and then use your router to follow it.

Straight Router Bits

Bits for Rabbeting: At Toolstop, we call rabbet router bits “RB Router Bits,” so keep an eye out for that in the names of our products. With rabbeting bits, you can make cuts that are straight, vertical, or horizontal. Rather than making intricate designs to finish off wood, they are more often used to make spaces for other things to fit in. For example, picture frames use rabbet cuts so that the glass can fit inside the frame without any gaps.

Bits for Rabbeting

Flush Trim Router Bits: These router bits are used to line up the edges of two pieces of material so that they are flush. For instance, if you need to glue two pieces of wood together, flush trim router bits will make sure that they have the same edge and fit together perfectly. This method is often used on surfaces that are veneered.

Trim Router Bits That Are Flush

Chamfer Router Bits—The chamfer router bit is another very common type of router bit. With the right bit, these router cutters can make bevel edges at a certain angle. They can also be used to change the edge of your work piece.

Chamfer Bits for Routers

Round Over Router Bits: These bits work a lot like chamfer router bits, but they can be used for much better designs. With these router bits, you can give a piece of material decorative and stylish edges that really make it stand out. To help you get different edges, they come in different styles, such as round over bits and cove router bits.

Woodworking Supplies Mesa by Timber Woodworking

Timber Woodworking offers hardwoods in Mesa, Arizona. We specialize in woodworking tools, equipment, and supplies for commercial woodworking cabinet shops or furniture manufacturers as well as the home shop hobbyist. Contact us today, or call if you should have any questions.

Types of Saws
Written by craig braddick

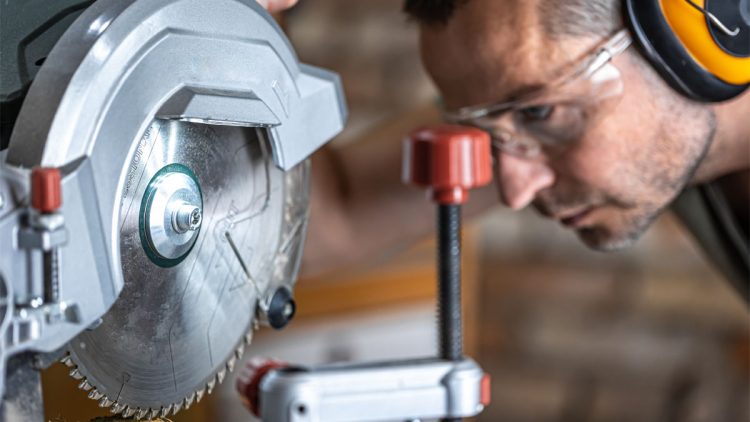
The Best Ways To Use A Circular Saw

Best Ways to Use a Circular Saw Safely & Effectively 🛠️🔪

A circular saw is a versatile power tool used for making straight cuts in wood, metal, plastic, and other materials. Whether you’re cutting plywood, framing lumber, or trim, using a circular saw correctly ensures clean cuts, safety, and efficiency.

1. Choose the Right Blade

🔹 Standard Wood Blade (24-40 teeth) → Good for rough framing cuts.
🔹 Plywood/Finish Blade (60+ teeth) → For smooth, splinter-free cuts.
🔹 Metal Cutting Blade → For aluminum or sheet metal.
🔹 Masonry Blade → For cutting concrete, tile, or stone.

👉 Tip: Always use a sharp blade for cleaner cuts and less strain on the motor.

2. Adjust the Cutting Depth

🔹 Set the blade depth so it extends 1/4 inch below the material.
🔹 Too deep = more kickback risk & strain on the motor.
🔹 Too shallow = incomplete cuts & binding.

👉 How to adjust: Loosen the depth lever, set the blade, and retighten.

3. Use a Guide for Straight Cuts

📏 Best techniques for accuracy:
✅ Use a speed square to guide short cuts.
✅ Clamp a straight-edge or a guide rail for long, straight cuts.
Mark the cut line clearly with a pencil or chalk.

👉 Pro Tip: Cut with the good side facing down (reduces splintering).

4. Position Yourself Correctly

🔹 Stand to the side of the saw, NOT directly behind it (prevents injury from kickback).
🔹 Hold the saw firmly with both hands.
🔹 Keep the cord or battery pack out of the way.

5. Make the Cut Smoothly

✅ Start the saw before it touches the material.
✅ Let the blade reach full speed, then push forward steadily.
✅ Don’t force the saw—let the blade do the work.
✅ Use both hands until the cut is complete.

👉 Pro Tip: If the saw binds or stalls, stop immediately and check for pinching or improper depth settings.

6. Prevent Kickback ⚠️

🚨 Kickback happens when the blade binds, causing the saw to jerk backward.
🔹 Keep the saw moving smoothly—don’t stop mid-cut.
🔹 Make sure the material is supported on both sides of the cut.
🔹 Never lift the saw blade mid-cut—always complete the cut first.

7. Wear Proper Safety Gear 🦺

Eye protection (safety glasses or goggles).
Hearing protection (circular saws are LOUD!).
Dust mask (if cutting a lot of material).
Gloves (optional but can help with grip).

8. Maintain & Store Your Saw Properly

🔧 Keep the blade clean and sharp (dull blades cause rough cuts & more danger).
🔧 Check the cord, battery, and safety guard before each use.
🔧 Store the saw in a dry place to prevent rust.

Bonus: Advanced Techniques

📌 Bevel Cuts → Tilt the baseplate for angled cuts (great for trim & framing).
📌 Plunge Cuts → Start the cut in the middle of a board by tilting the saw forward.
📌 Track Saw Alternative → Use a guide rail for perfect straight cuts.

Final Thought:

Using a circular saw correctly & safely makes a huge difference in the quality of your cuts and prevents accidents.

Woodworking Supplies Mesa by Timber Woodworking

Timber Woodworking offers hardwoods in Mesa, Arizona. We specialize in woodworking tools, equipment, and supplies for commercial woodworking cabinet shops or furniture manufacturers as well as the home shop hobbyist. Contact us today, or call if you should have any questions.
Types of Saws
Written by craig braddick

The Differences Between Cabinet Saws and Table Saws

What’s the difference between a table saw and a cabinet saw?
Both cabinet saws and table saws are strong woodworking tools that can make precise cuts in wood and other materials. However, there are a few main ways in which they are different:

1. Building and Construction:

Cabinet Saw: These are built to last longer and be stronger. The motor is usually housed in a cabinet base that is closed off, which reduces vibration and noise. The trunnions, which hold the saw blade and control its movement, are usually attached to the cabinet. This makes the saw stable and accurate.

Table Saw: Table saws come in many shapes and sizes, but most of them have an open base or stand. They might not be as heavy-duty as cabinet saws, which could mean that they make more noise and vibration when they’re in use.

2. Performance and Power:

Cabinet Saw: Most cabinet saws have motors that are stronger than most table saws, usually between 3 and 5 horsepower. With this extra power, they can easily handle bigger jobs and tougher materials.

Tablet Saw: There are different motor sizes for table saws, with the smallest ones starting at about 1 to 2 horsepower. They can cut a lot of different things, but compared to cabinet saws, they might not be able to handle very thick or dense materials.

3. Accuracy and Exactness:

A cabinet saw is usually more stable and accurate when cutting because it is built to be heavier. Having the trunnions attached to the cabinet helps with alignment and cutting with more accuracy.

Table Saw: Table saws can be very accurate if they are set up correctly and have high-quality fences and miter gauges attached. However, they may not be as precise by nature as cabinet saws.

4. Price:

Cabinet Saws: These are usually more expensive because they are built to last longer, have bigger motors, and have extra features that make them better for professional use.

Table Saw: There is a wide range of prices for table saws, from smaller, less expensive models for hobbyists to larger, more expensive models for professionals.

5. Being portable:

Cabinet saws are usually bigger and heavier than table saws, which makes them harder to move around.

Table Saw: Many table saws are made to be portable, with stands or wheels that fold up and out of the way for easier movement.

There are pros and cons to both types of saws, and users should choose the right one for their needs, workspace, budget, and the type of woodworking they plan to do. Professional woodworking shops often choose cabinet saws because they are strong, accurate, and long-lasting. On the other hand, hobbyists and contractors like table saws because they are flexible and cheap.

Woodworking Supplies Mesa by Timber Woodworking

Timber Woodworking offers hardwoods in Mesa, Arizona. We specialize in woodworking tools, equipment, and supplies for commercial woodworking cabinet shops or furniture manufacturers as well as the home shop hobbyist. Contact us today, or call if you should have any questions.
1 2 3