Woodworking Tools
Written by craig braddick

Using A Table Saw

The most expensive table saws, which range from $700 for a contractor-grade model to $300 for a standard model, are sold by the size of the blades they can use. Most table saws are 10 inches, which is the best size for most carpentry and woodworking jobs. However, 8-inch table saws are good for small jobs, and 12-inch table saws are great for making deeper cuts in thicker materials. The following are parts of a table saw:

When you use a table saw, be careful.

Too many amateurs and professionals have hurt themselves badly because they don’t know how to use a table saw. The material being cut can get stuck and kick back if it is not handled properly. This can either throw the material at the person cutting it at high speed or jerk it violently and pull their fingers toward the blade. Here are some things you can do to lower the chance of kickback:

Don’t turn on the saw if the thing you want to cut is touching the blade.
When you make “rip” cuts, you should always use the rip fence.

For crosscuts, you should always use the miter gauge instead of the rip fence because the rip fence doesn’t provide enough support.

During the cut, make sure the material is flat against the table.

Take the time to read the manufacturer’s safety instructions and make sure to always wear goggles and ear protection when using the table saw. This will help prevent kickback. Take the saw off the power before you adjust or align the blade, and don’t take off the safety guards that came with it.

Getting Ready to Cut

You can make dado cuts, compound angles, and rabbet joints with table saw accessories like clamps, stops, and jigs. But woodworkers mostly use the table saw for two basic cuts. The most common way to use a table saw is to rip, which means cutting things to a certain width. Crosscutting is a way to cut things to a certain length. The steps below will show you how to make each of these common cuts with a table saw.

How to Use a Table Saw

The rip fence on a table saw lets you make the easiest cut by adjusting to the width of the cut you want. It also acts as a guide to help you keep the material steady while you cut.

First, get the saw ready.


Take the table saw off the power and put a rip blade that works with the material you want to cut into the blade arbor on top of the table. Change the height of the blade so that it doesn’t stick out more than ¼” above the material you’re cutting. If you want to cut long pieces of wood from ½” plywood, for example, don’t raise the blade more than ¾” above the table.

To do this, loosen the arbor nut (the nut that holds the blade in place) with the arbor nut wrench that came with your table saw. Then, put the rip blade on the table saw so that the teeth face the front of the machine. From the top down, a table saw blade spins toward you. This means that the sharp blades should face the front of the table saw and not the back. Make sure the arbor nut is tight.

Step 2: Put the fence in place.

To set up the rip fence, first release the locking lever on the front of the fence. This locks the fence in place, and then slide it so that the inside edge matches the cut width you want. There is a ruler on the front of your table saw to help you set up the fence, but don’t use it alone to measure your cut. How far is it from the fence to the edge of the saw blade tooth that is closest to you? Use a precise tape measure. There are two sets of teeth on a saw blade. One set faces left and the other faces right. If you measure to the closest edge, you’ll know how much wood the blade will remove during the cut. This is called the kerf.

Step 3: Put the wood in place.

Place the material to be cut on the table saw so that it lines up with the rip fence. Do not let the material touch the blade until the saw is fully on and the blade is moving at full speed. Before the blade can start cutting, the material must touch it. This will definitely cause kickback.

Step 4: Move the wood through the saw.

Slowly but firmly move the material along the rip fence with one or both hands, depending on how much control you need to keep the material flat on the table top and in line with the fence. When ripping big, thick boards, you should usually start by guiding the material with both hands and then switch to one hand as the cut gets closer to being done. Always keep the material flat when you cut it if it’s long and goes past the back of the table. You can use a table extension to support it or have someone help you support it. Don’t let go of the material as you walk around to the back of the table saw. If you do, the material could lift off the table, which would make kickback more likely.

Step 5: If you need to, use a push stick.

If you need to keep your fingers away from the moving blade, use a push stick. When you’re making narrow rips that put your fingers just a few inches from the blade, a push stick is there to help guide the material. Always use a push stick instead of taking a chance.

How to Use a Table Saw

How to Cut in Half

It’s important to remember not to use the rip fence as a guide when cutting cross-cuts on a table saw. Long pieces are kept stable by the rip fence, but most crosscuts are made on thin materials, like when you cut something in half or remove the end of a board. When crosscuts are being done, there isn’t enough material to fit along the rip fence, so trying to use it increases the risk of dangerous kickbacks. Use a miter gauge instead.

A miter gauge has a bar that fits into one of the deep grooves on the table’s surface and a guide fence that keeps the piece stable. The miter gauge slides from the front to the back of the table saw when the bar is in a groove. This lets you control the cut. A guide that looks like a protractor can be adjusted by loosening a knob and then choosing the right angle before tightening the knob again. There are times when the miter gauge that comes with a table saw is a bit light. If you’re going to be crosscutting a lot, you might want to buy a stronger aftermarket miter gauge. You can also use a miter sled (see “Note” below).

1. Turn off the power to the table saw and put a crosscut blade in the arbor, just like in Step 1 of “How to Rip.”

2. Change the miter gauge’s protractor guide to make crosscuts that are either straight or mitered, which means they are at an angle.

3. Place the material along the front edge of the miter gauge and make sure it is straight. If you need to, use clamps to hold it in place.

4. Connect the table saw to the power and turn it on. Do not put any wood on the blade until it is spinning at full speed.

5. Put the material you’re cutting and the miter gauge together very carefully and slowly move them through the moving blade.

6. Turn off the table saw before getting things that were cut off close to the blade.

Important: You might want to buy an extra miter sled to help hold your material steady while you crosscut it. A miter sled looks like a shallow rectangular box with slots already cut out of the bottom. You can place the material inside the sled and then slide the whole thing over the table to cut. There’s no need for you to buy one, though. There are free, detailed plans online that you can use to make your own miter sled. You could use your new table saw to make a miter sled as your first project.

We specialize in woodworking tools, equipment, and supplies for commercial woodworking cabinet shops or furniture manufacturers as well as the home shop hobbyist. Contact us today, or call if you should have any questions.
Woodworking Tools
Written by craig braddick

Buying A Used Table Saw

Buying a Used Table Saw: What to Look For & Tips 🛠️🪵

A table saw is one of the most essential tools for woodworking, and buying a used one can save you a lot of money—but only if you get a good deal! Here’s a checklist to help you find the best used table saw and avoid costly mistakes.

1. Decide What Type of Table Saw You Need

🔹 Jobsite/Tabletop Saws → Portable, lightweight, for DIY & small jobs.
🔹 Contractor Saws → Heavier, better for serious woodworking & furniture making.
🔹 Cabinet Saws → Heavy-duty, precision cuts, great for professional shops.
🔹 Hybrid Saws → A mix of contractor & cabinet saws, good for advanced hobbyists.

👉 Pro Tip: If you need precision and power, go for a contractor or cabinet saw. If you need portability, a jobsite saw is best.

2. Inspect the Saw’s Condition

🔧 Essential Parts to Check:

Tabletop & Fence → Should be flat, smooth, and free of deep rust or warping.
Blade Arbor & Bearings → Spin the arbor; it should feel smooth with no wobble.
Motor & Belts → Run the saw if possible. Listen for strange noises. Look for belt cracks.
Rip Fence & Miter Gauge → Should slide easily and lock firmly.
Blade & Inserts → Worn blades aren’t a dealbreaker, but good ones are a bonus.
Gears & Adjustments → Tilt and height adjustments should move freely without stiffness.

3. Test the Saw (If Possible)

🔹 Run the saw to check:
✅ Smooth startup (no delay or struggle).
✅ Consistent blade speed (no excessive vibration).
✅ Fence alignment & cut accuracy.
✅ Noise level (loud grinding or knocking sounds = problems).

⚠️ Red Flags:
🚨 Blade wobbles while running.
🚨 Fence doesn’t lock squarely.
🚨 Burn marks on test cuts (could mean a dull blade or motor issues).

4. Check for Safety Features

✔️ Blade Guard & Riving Knife → Helps prevent kickback.
✔️ Anti-Kickback Pawls → Should be intact and functional.
✔️ Emergency Shutoff Switch → Should be easy to access.

👉 If safety features are missing, you may need to replace them, which can add cost.

5. Research the Brand & Model

🔎 Look up the saw’s brand, model, and reviews online.
🔎 Check if replacement parts are available.
🔎 Popular, reliable brands include:

  • SawStop (best safety tech)
  • Powermatic (high-end, durable)
  • Delta (solid contractor saws)
  • Jet (great for serious woodworkers)
  • DeWalt, Bosch, Makita (good portable/jobsite saws)

6. Negotiate the Price 💰

🔹 Used table saw prices vary based on type & condition:

  • Jobsite/Tabletop Saws: $100–$500
  • Contractor Saws: $300–$1,200
  • Cabinet Saws: $800–$3,000
  • Hybrid Saws: $500–$1,500

📌 Tip: If repairs are needed (blade, fence, belts), use that to negotiate a lower price.

7. Where to Buy Used Table Saws

🔹 Facebook Marketplace, Craigslist, eBay – Best for local deals.
🔹 Estate Sales & Auctions – Often have great bargains.
🔹 Tool Shops & Woodworking Forums – Sometimes offer refurbished models.

Final Thoughts: Is It Worth Buying Used?

✅ If the saw runs well, is solidly built, and has available parts, a used table saw can be a great deal.
❌ If it’s missing critical parts, makes odd noises, or has a wobbly arbor, it’s not worth the hassle.

We specialize in woodworking tools, equipment, and supplies for commercial woodworking cabinet shops or furniture manufacturers as well as the home shop hobbyist. Contact us today, or call if you should have any questions.

What is a Router
Written by craig braddick

How To Use A Router

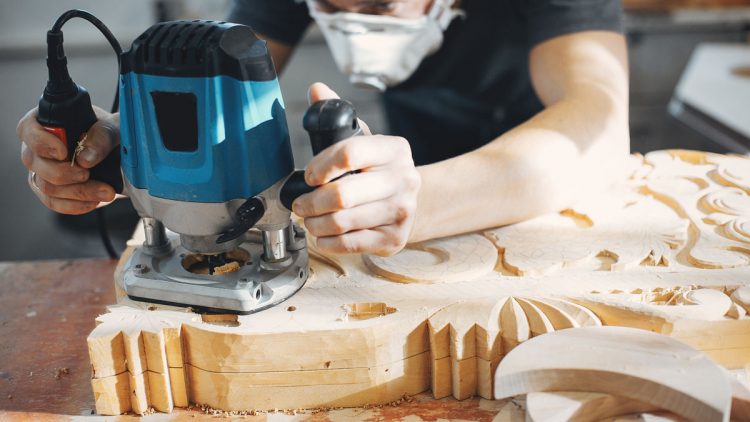
Routers are a type of power tool that is mostly used in joinery, woodworking, and carpentry to make things like cabinets and furniture. They are most often used for working with wood, but they can also be used on plastic and some other soft materials.

What Does A Router Do?

A router spins quickly to cut, shape, and trim wood to make edges and corners that are perfectly finished. Routing a piece of work improves its overall design.

Most of the time, they are used to make patterns in wood, like rounding off the edges of worktops, drawing on picture frames and cabinets, and a lot more. In this way, they raise the bar for plain wooden edges.

You might not believe it, but wood routers do more than just cut and shape wood. You can make dadoes, rabbets, and other shapes.

Step by Step Instructions on How to Use a Router

Step 1: Make sure the tool is off and turn it over so that the router bit fits.
Step 2: Change the depth of your router based on the type of router you have and the job you need to do.
Step 3: If your router has more than one speed, set it to the right speed for the job.
Step 4: If you can, hook up a dust extractor.
Step 5: For a smoother process, start cutting in the opposite direction of the plane’s spin.
Step 6: For hand-held routers, feed from left to right.
Step 7: Feed from right to left on router tables

How to tell a router what its depth is

You can change how deeply the router cuts into the material and how much material is removed by changing the depth. The way you do this will depend on the type and brand of router you have, but it’s pretty simple and will be explained in your manual. If you want to change the depth of a plunge router, all you have to do is use the depth stop scale to move the tool to the right depth for your cut. Fixed base routers stay at the same height during the whole cut. The trimmer base is all that is needed to change them.

How to use a router for wood

If your router has more than one speed, the next step is to set it to the right speed for the job. You can find this in the instructions. After that, you can connect it to your dust extractor if it can do that. Since routing can make a lot of dust, this is always a good idea if you plan to do it a lot. The router is now ready to be turned on and used.

Since router bits spin in a clockwise direction, it’s best to go against the clock when routing the top of a piece of work. The router is coming at you from this angle, which gives you more control and accuracy. The wood does tend to chip when this method is used, though. This could happen, so go backwards and clockwise for a few inches. For edges, move the router the other way from the way the bit is spinning (see below).

For hand-held routers, feed from left to right.

When feeding router tables, go from right to left.

You should always go the opposite way of the cutter’s spin. The bit will be able to glide more easily, which will make the process go more smoothly and give you the best results.

If you have never used a router before, you can always try it out on some scrap wood first. A parallel guide is an important part of most routers that makes sure plunge cuts are perfectly straight.

Which router bit to use

There are a lot of different kinds of router bits and cutters out there. To get clean routed edges, you need to use a sharp, good router bit.

Here is a list of some of the most common router bits and what they are used for. You can also look at the diagram to get a better idea of the cuts that these router bits will make.

Types of router bits:

One type of router bits that is used a lot is the straight router bit. They cut the material straight through to hollow it out so that grooves or dadoes can be made. People also like to use straight router cutters to carve letters, numbers, and other shapes into wood. This is where your parallel guide will come in handy for making straight cuts. To engrave, just draw the shape, letter, or number you want to use on the wood and then use your router to follow it.

Straight Router Bits

Bits for Rabbeting: At Toolstop, we call rabbet router bits “RB Router Bits,” so keep an eye out for that in the names of our products. With rabbeting bits, you can make cuts that are straight, vertical, or horizontal. Rather than making intricate designs to finish off wood, they are more often used to make spaces for other things to fit in. For example, picture frames use rabbet cuts so that the glass can fit inside the frame without any gaps.

Bits for Rabbeting

Flush Trim Router Bits: These router bits are used to line up the edges of two pieces of material so that they are flush. For instance, if you need to glue two pieces of wood together, flush trim router bits will make sure that they have the same edge and fit together perfectly. This method is often used on surfaces that are veneered.

Trim Router Bits That Are Flush

Chamfer Router Bits—The chamfer router bit is another very common type of router bit. With the right bit, these router cutters can make bevel edges at a certain angle. They can also be used to change the edge of your work piece.

Chamfer Bits for Routers

Round Over Router Bits: These bits work a lot like chamfer router bits, but they can be used for much better designs. With these router bits, you can give a piece of material decorative and stylish edges that really make it stand out. To help you get different edges, they come in different styles, such as round over bits and cove router bits.

Woodworking Supplies Mesa by Timber Woodworking

Timber Woodworking offers hardwoods in Mesa, Arizona. We specialize in woodworking tools, equipment, and supplies for commercial woodworking cabinet shops or furniture manufacturers as well as the home shop hobbyist. Contact us today, or call if you should have any questions.

Types of Saws
Written by craig braddick

The Best Ways To Use A Circular Saw

Best Ways to Use a Circular Saw Safely & Effectively 🛠️🔪

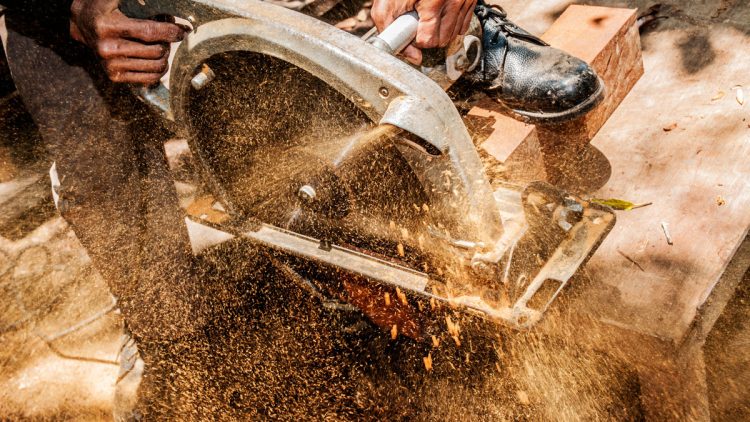
A circular saw is a versatile power tool used for making straight cuts in wood, metal, plastic, and other materials. Whether you’re cutting plywood, framing lumber, or trim, using a circular saw correctly ensures clean cuts, safety, and efficiency.

1. Choose the Right Blade

🔹 Standard Wood Blade (24-40 teeth) → Good for rough framing cuts.
🔹 Plywood/Finish Blade (60+ teeth) → For smooth, splinter-free cuts.
🔹 Metal Cutting Blade → For aluminum or sheet metal.
🔹 Masonry Blade → For cutting concrete, tile, or stone.

👉 Tip: Always use a sharp blade for cleaner cuts and less strain on the motor.

2. Adjust the Cutting Depth

🔹 Set the blade depth so it extends 1/4 inch below the material.
🔹 Too deep = more kickback risk & strain on the motor.
🔹 Too shallow = incomplete cuts & binding.

👉 How to adjust: Loosen the depth lever, set the blade, and retighten.

3. Use a Guide for Straight Cuts

📏 Best techniques for accuracy:
✅ Use a speed square to guide short cuts.
✅ Clamp a straight-edge or a guide rail for long, straight cuts.
Mark the cut line clearly with a pencil or chalk.

👉 Pro Tip: Cut with the good side facing down (reduces splintering).

4. Position Yourself Correctly

🔹 Stand to the side of the saw, NOT directly behind it (prevents injury from kickback).
🔹 Hold the saw firmly with both hands.
🔹 Keep the cord or battery pack out of the way.

5. Make the Cut Smoothly

✅ Start the saw before it touches the material.
✅ Let the blade reach full speed, then push forward steadily.
✅ Don’t force the saw—let the blade do the work.
✅ Use both hands until the cut is complete.

👉 Pro Tip: If the saw binds or stalls, stop immediately and check for pinching or improper depth settings.

6. Prevent Kickback ⚠️

🚨 Kickback happens when the blade binds, causing the saw to jerk backward.
🔹 Keep the saw moving smoothly—don’t stop mid-cut.
🔹 Make sure the material is supported on both sides of the cut.
🔹 Never lift the saw blade mid-cut—always complete the cut first.

7. Wear Proper Safety Gear 🦺

Eye protection (safety glasses or goggles).
Hearing protection (circular saws are LOUD!).
Dust mask (if cutting a lot of material).
Gloves (optional but can help with grip).

8. Maintain & Store Your Saw Properly

🔧 Keep the blade clean and sharp (dull blades cause rough cuts & more danger).
🔧 Check the cord, battery, and safety guard before each use.
🔧 Store the saw in a dry place to prevent rust.

Bonus: Advanced Techniques

📌 Bevel Cuts → Tilt the baseplate for angled cuts (great for trim & framing).
📌 Plunge Cuts → Start the cut in the middle of a board by tilting the saw forward.
📌 Track Saw Alternative → Use a guide rail for perfect straight cuts.

Final Thought:

Using a circular saw correctly & safely makes a huge difference in the quality of your cuts and prevents accidents.

Woodworking Supplies Mesa by Timber Woodworking

Timber Woodworking offers hardwoods in Mesa, Arizona. We specialize in woodworking tools, equipment, and supplies for commercial woodworking cabinet shops or furniture manufacturers as well as the home shop hobbyist. Contact us today, or call if you should have any questions.
Types of Saws
Written by craig braddick

The Differences Between Cabinet Saws and Table Saws

What’s the difference between a table saw and a cabinet saw?
Both cabinet saws and table saws are strong woodworking tools that can make precise cuts in wood and other materials. However, there are a few main ways in which they are different:

1. Building and Construction:

Cabinet Saw: These are built to last longer and be stronger. The motor is usually housed in a cabinet base that is closed off, which reduces vibration and noise. The trunnions, which hold the saw blade and control its movement, are usually attached to the cabinet. This makes the saw stable and accurate.

Table Saw: Table saws come in many shapes and sizes, but most of them have an open base or stand. They might not be as heavy-duty as cabinet saws, which could mean that they make more noise and vibration when they’re in use.

2. Performance and Power:

Cabinet Saw: Most cabinet saws have motors that are stronger than most table saws, usually between 3 and 5 horsepower. With this extra power, they can easily handle bigger jobs and tougher materials.

Tablet Saw: There are different motor sizes for table saws, with the smallest ones starting at about 1 to 2 horsepower. They can cut a lot of different things, but compared to cabinet saws, they might not be able to handle very thick or dense materials.

3. Accuracy and Exactness:

A cabinet saw is usually more stable and accurate when cutting because it is built to be heavier. Having the trunnions attached to the cabinet helps with alignment and cutting with more accuracy.

Table Saw: Table saws can be very accurate if they are set up correctly and have high-quality fences and miter gauges attached. However, they may not be as precise by nature as cabinet saws.

4. Price:

Cabinet Saws: These are usually more expensive because they are built to last longer, have bigger motors, and have extra features that make them better for professional use.

Table Saw: There is a wide range of prices for table saws, from smaller, less expensive models for hobbyists to larger, more expensive models for professionals.

5. Being portable:

Cabinet saws are usually bigger and heavier than table saws, which makes them harder to move around.

Table Saw: Many table saws are made to be portable, with stands or wheels that fold up and out of the way for easier movement.

There are pros and cons to both types of saws, and users should choose the right one for their needs, workspace, budget, and the type of woodworking they plan to do. Professional woodworking shops often choose cabinet saws because they are strong, accurate, and long-lasting. On the other hand, hobbyists and contractors like table saws because they are flexible and cheap.

Woodworking Supplies Mesa by Timber Woodworking

Timber Woodworking offers hardwoods in Mesa, Arizona. We specialize in woodworking tools, equipment, and supplies for commercial woodworking cabinet shops or furniture manufacturers as well as the home shop hobbyist. Contact us today, or call if you should have any questions.

Types of Saws
Written by webtechs

Types of Saws

Whether you are a I’ll fix it on the weekend, a woodworker, or a seasoned professional, the tools you decide to purchase can make or break a project. However, it’s not only about the tools—it’s about how they work out your biggest hindrances, make your workflow more streamlined, and help you produce improved craftsmanship.

In this guide, we go beyond just listing saws.

We are going to break down why these saws matter, how they are going to impact your work, and even what to look for when purchasing them—so you’re not throwing money away on the wrong gear.

Below are just a few of the types of saws

Keep reading to learn more!

Handsaw

“Basic” Handsaw This is the most identifiable and the simplest of all of saws to operate. It works on all types of wood but is best for “soft” woods. Can be used for making all types of cuts.

Hack Saw

This type of handsaw features a fine-toothed dispensable blade on a “C”-frame. It is commonly used for sawing plastics and metals.

Japanese Saws

This type of saw features a slimmer blade with ripped teeth on one side and crosscut teeth on the other. These saws are more typically found in making furniture or fine woodworking situations.

Coping Saw

This uncomplicated yet useful cutting tool comprises of a thin dispensable blade in a “C”- frame that utilizes exchangeable blades for both woods and metals. It can cut tight diameters; however, perhaps its most useful attribute is the ability to take the blade out and thread it through a pre-drilled hole to cut the inside profiles.

Jigsaw/Reciprocating Saw

If you have ever needed to cut a customized shape out of a sheet of plywood or possibly plastic, this is a perfect saw. If an ideally straight line is what you require, then leave this saw on the work shelf. Despite being in the hands of a knowledgeable woodworker the blade is going to drift easily.

Circular Saw

This saw is the go-to for making rip and crosscuts. If you purchase only one power-driven saw, this is the one. When it is combined with saw guides it can make shockingly accurate cuts.

Table Saw

Ripping and beveling are the things table saws do best. It can be safely utilized to miter and crosscut using jigs and other equipment. Typically, not very portable, its versatility makes this one of the most functional tools in a woodworking shop.

Band Saw

These are the best saws for cutting shapes in wood, plastics or metal. The bandsaw is a workhorse for props and making furniture. Comparable to jigsaws, band saws can also drift if you’re not paying close enough attention to the line.

Miter Saw

The best saw for cutting meticulous angles and basic crosscuts. Miter saws are ideal for cutting customized angles, making these perfect for moulding and trim work.

Oscillating Saw

Its vibrating blade is beneficial for precise cuts within restricted spaces.

*Don’t forget, few saws are particularly designed for cutting flesh and bone, but most can if the opportunity presents it. Keep it safe!*

Types of Saw Cuts

  • Rip cuts are cuts in the direction of the grain of the wood
  • Cross cuts are cuts that cut across the grain of the wood at 90°
  • Mitre cuts across the grain of wood different than 90°
  • Bevel cuts at an angle different than 90° along the thickness of the material being cut

Woodworking Supplies Mesa by Timber Woodworking

Timber Woodworking offers hardwoods in Mesa, Arizona. We specialize in woodworking tools, equipment, and supplies for commercial woodworking cabinet shops or furniture manufacturers as well as the home shop hobbyist. Contact us today, or call if you should have any questions.

What is an Air Compressor
Written by webtechs

What is an Air Compressor?

An air compressor is an instrument that converts power (via an electrical motor, diesel or gas engine, etc.) into possible energy stored in pressurized air (i.e., compressed air). By one of numerous ways, an air compressor forces more and more air into its tank, increasing the pressure. When the tanks’ pressure reaches its engineered ceiling, the compressor turns off. That compressed air is then held in the tank until it needs to be used.

The energy held in the compressed air can be used for a multitude of applications, exploiting the kinetic energy of the air as it is released and the tank de-pressurizes. As tank pressure gets to its lower threshold, the compressor turns back on and re-pressurizes the tank. An air compressor needs to be distinguished from a pump since it operates for any gas/air, whereas pumps work through liquid.

Air Compressors can be categorized based on the pressure they deliver:

Low-pressure ones (LPACs), that have a release pressure of 150 psi or lower

Medium-pressure ones (MPACs) that have a release pressure of 151 psi to 1,000 psi

High-pressure ones (HPACs), that have a release pressure over 1,000 psi

What are the uses of compressed air?

When you examine the instances above, you might think how compressed air is applied in these circumstances. In certain sectors, it is utilized in 2 manners: as energy and as a part of a technique. These 2 kinds are known as Energy Air and Active Air accordingly.

First, Energy Air is used for conserving and transmitting energy to carry out mechanical work. More accurately, it is used for powering pneumatic production devices, air-driven lathe chucks, pressure washing workpieces and to transfer or cool components throughout production.

Active air, in contrast, is required as an active and essential part of a specific process. In this case, the air contacts the product therefore the air quality is particularly important. The cleaner, dry air quality can be enhanced by utilizing oil-free air compressors and by the treatment of the air using one of the many quality air devices available. This kind of compressed air is used in the below industries:

  • Pharmaceuticals
  • Chemicals
  • Aeration and Agitation
  • Food & Beverage
  • Medical Breathing Air
  • Semiconductor & Electronics

To start, you may believe air compressors are only used for inflating vehicle tires. Nevertheless, it does beyond that. They are utilized in the manufacturing of those tires, the fabric on vehicle seats and the sanding of the exhaust pipes. More significantly, compressed air is at the core of bus’s safety system. An air compressor is at the center of the air braking system and suspension, it also guarantees the airbag gets inflated in the event of an accident.

When it comes to choosing the right kind of compressor for your needs, you should ask yourself the following questions

  • What are my applications?
  • How much flow does my shop use?
  • What pressure is needed within my shop?
  • Do I require clean /dry air?
  • How many hours each year do my compressor operate?
  • How many shifts do I run each day?
  • Are there any plans for expansion in the future?

Woodworking Supplies Mesa by Timber Woodworking

Timber Woodworking offers hardwoods in Mesa, Arizona. We specialize in woodworking tools, equipment, and supplies for commercial woodworking cabinet shops or furniture manufacturers as well as the home shop hobbyist. Contact us today, or call if you should have any questions.

What is a Bandsaw
Written by webtechs

What is a Bandsaw?

A bandsaw utilizes a long sharp blade that consists of a continual band of toothed metal rotating on opposite sided disks to cut materials like wood.  Bandsaws can additionally be used for metal working and lumbering, however, could possibly cut a wider range of materials.

The benefits of utilizing a band saw include consistent cutting action due to the evenly distributed tooth load, and the capability to cut curved or irregular shapes.

A lot of bandsaws have 2 disks interlinked by a belt or chain spinning in the same plane, one of which is power driven.  The blade comes in an assortment of sizes which allows this machine to be highly adaptable.

The blades are positioned on disks large enough not to cause exhaustion due to the flexing that occurs when the blade goes from a circular contour to a straight contour.  Larger bandsaws are required to have a distortion integrated into them that counterbalances the forces and heating of operations, referred to as benching. They additionally require service at periodic intervals.

The shape of the tooth neck is highly optimized and differs subject to the type and state of the wood you are needing to cut.

Saw Types:

Below are just a few of the types of bandsaws available:

Head Saws

Head Saws are big bandsaws that make the primary cuts in a log.  They come with a two-to-three-inch tooth space on its cutting edge and slivered teeth on its backside.  Slivered teeth don’t cut and are intended to wipe slivers out of the way when the blade must back out of a cut.

Resaws

Resaws are a substantial bandsaw maximized for cutting wood along its grain to make larger segments into smaller segments or into veneers.  Resawing veneers require a wide blade typically two to three inches with a minute kerf to minimize waste.

Double Cut Saws

Double Cut Saws come with cutting teeth on each side.  They are usually very large, comparable in size to a head saw.

Feed Mechanisms

Below are just a few of the types of feed mechanisms available:

Gravity Feed Saws

Gravity Feed saws – this saw falls by its own gravity; however, changes can be made to its cutting force using a counterbalance.

Hydraulic Feed Saws

Hydraulic Feed saws utilize a pressurized hydraulic piston to power the saw through the wood, set at differing pressures and rates.

Screw Feed Saws

Screw Feed saws utilize a leadscrew for moving the saw.

Fall Mechanisms

Below are just a few of the types of fall mechanisms available:

Pivot Saws

Pivot saws swivel in an arc as they go through the wood

Single Column Saws

Single column saws have a large diameter pillar that the whole saw rides up and down on.

Dual Column Saws

Dual column saws come with a pair of large pillars, one on each side of the wood. These types of saws are the largest style of machine bandsaws faced.

Typical Tooth Forms

Below are just a few of the types of tooth forms available:

Precision Blades

Precision blades provide accurate cuts with a clean texture.

Buttress Blades

Buttress blades give faster cutting and larger feed per tooth.

Claw Tooth Blades

Claw tooth blades offer added clearance for quick cuts and soft material.

Automated Bandsaws

There are also automated bandsaws which have features like preset feed rates, returns, falls, part dispensing, and part fastening. These tend to be used in production settings in which having a machine operator per saw is unpractical.

Do You Need a Bandsaw

A hobbyist would only require a small bandsaw, which will decrease the amount of physical energy they would use cutting the wood manually.

Larger organizations like sawmills use very big bandsaws for cutting lumber as they produce very little waste and saw on labor hours.

Woodworking Supplies Mesa by Timber Woodworking

Timber Woodworking offers hardwoods in Mesa, Arizona. We specialize in woodworking tools, equipment, and supplies for commercial woodworking cabinet shops or furniture manufacturers as well as the home shop hobbyist. Contact us today, or call if you should have any questions.

Jointer vs Planer
Written by webtechs

Jointer vs Planer

Do you know the differences between a jointer and a planer? If not, don’t fret! You are not alone. A lot of do-it-yourselfers are uncertain of the differences between these two woodworking devices.

Each tool has its own unique pros and cons, so it can be challenging to decide which one is right for you. In this easy-to-understand post, it will explain the differences between these two devices and help you determine which one is best for your project.

What is a Jointer?

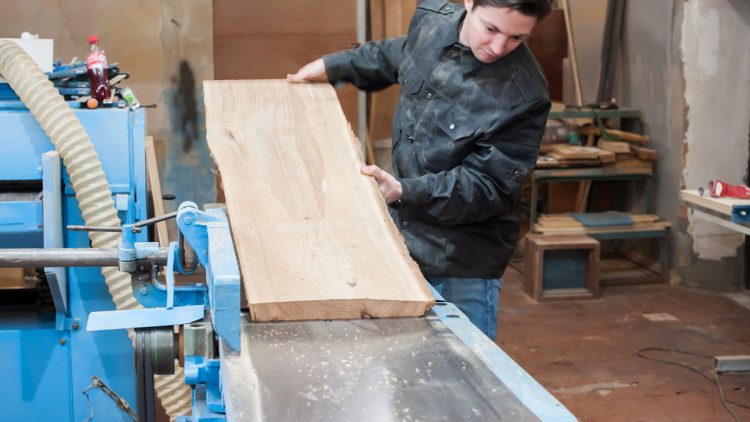
A jointer is a woodworking device that operates similar to a hand plane to smooth the surface of wooden boards. There are various primary distinctions between a jointer and a hand plane. A hand plane is a manual tool operated excluding electricity, whereas a jointer is an electrical tool.

Jointers have outfeed and infeed tables with a spinning blade fixed between them. Wooden boards are passed over the rotating blade for removing small amounts of wood, while a plane is passed over a wooden board.

Using a hand plane to smooth a board necessitates skill and takes time, whereas using a jointer is fast, easy, and practically effortless.

Jointers can also be utilized for undertakings other than squaring edges, chamfering rabbeting, and beveling.

Jointer Pros and Cons

Jointers, just like with anything else, comes with their pros and cons.

Pros

  • Fast and easily flattens material and squares edges
  • Needs less time and effort than using a manual hand plane
  • Rights common wood defects like warped, bowed, cupped, or twisted wooden boards
  • Its fence can be adjusted for creating square edges, chamfers, or bevels

Cons

  • Lacks the capability to control the finished thickness of a wooden board
  • Lacking the ability to guarantee that the 2nd face or edge is parallel to the 1st
  • Demands additional tools such as a planer and table saw for adjusting the thickness of a board and square the 2nd edge

What is a Planer?

A thickness planer, also referred to as a surfacer or simply a planer, is a woodworking device utilized to smooth and decrease boards to a uniform thickness across their length. Basically, the planer makes thicker boards thinner.

A wood planer operates like a manual plane for smoothing the surface of wooden boards, however, there are a few primary variations between them. Planes are manual devices operated without electricity, whereas a planer is an electrical device.

Planers have a flatbed with cutter head attached above. Rollers feed the work piece over the bed and underneath the cutter head, which extracts a layer of wood as it moves through the device.

Planers come with settings that can be used to guarantee a uniform thickness along the length of a wooden board. Whereas getting a uniform thickness with a manual plane is not impossible, it necessitates a considerable amount of time, labor, and skill.

Planer Pros and Cons

Planers, just like jointers, comes with their pros and cons.

Pros

  • Smooths and takes away defects from the surface of wooden boards
  • Makes a wooden board’s 2nd face parallel to the opposing face
  • Decreases wooden boards to uniform thickness

Cons

  • Unable to correct defects such as warped, bowed, cupped, or twisted wooden boards
  • Unable square the edges of wood

Final Thoughts

A jointer is good for flattening out wooden boards and squaring their adjoining edges, whereas a planer is perfect for thickening of boards. If you are just starting to be a woodworker, it is suggested to begin with a planer since it’s more adaptable than a jointer.

Woodworking Supplies Mesa by Timber Woodworking

Timber Woodworking offers hardwoods in Mesa, Arizona. We specialize in woodworking tools, equipment, and supplies for commercial woodworking cabinet shops or furniture manufacturers as well as the home shop hobbyist. Contact us today, or call if you should have any questions.

What is a Router
Written by webtechs

What is a Router?

Routers are electric powered devices utilized to cut an assortment of various shapes in materials like wood, MDF (medium density fiberboard), plastics, and some metals. They are used in association with router cutters, and occasionally other removable accessories, for cutting and shaping through materials in a wide variety of ways, for various tasks.

A router is little enough to be easily moved across a work piece or carried around on-site, making them particularly adaptable. Or, for a more permanent add on, you can attach a router upside down using a router table. This is handy when working with small pieces of material, or for repeated applications like creating embossed panels.

What can routers be used for?

Routers are commonly used for things like:

Notches and reduction

Maybe you want to right your own cupboards or drawers, or possibly install new hinges or door locks. Straight and reduction router blades can be utilized to produce a variety of various notches and reductions on the surfaces and on the edge of different materials.

Trimming and edging

A router combined with a proper trimming cutter tool is typically utilized when fitting work tops to trim the leftover laminate or wooden lipping, so it lays flush. A manual metal hand file could be used for doing this, however, it’s a lot easier and faster to use a router.

Joint making

In the past, each woodworking joint would have been produced with a chisel and a small hand saw – but a single misstep of your blade and your fragile dovetail was ruined permanently. Introducing the router. There are specialized cutters and jigs which can produce perfect joints, of different kinds, two times faster.

Molding and beading

Different molding and beading router cutters are accessible to produce appealing shapes on the edge on pieces of furniture or pieces of wood for the use of crown molding or wall skirting.

Creating holes

Using a plunge router and a plunge router bit you have the down-ward cutting possibility of a drill press and can produce an assortment of different sized holes in materials, subject to the cutter used.

Cabinetry

Routers are increasingly popular among cabinet makers, maybe since the router can complete just about all the woodworking tasks performed in the trade.

Other DIY tasks

Aside from using a power or a hand saw to crudely cut your material to size, a router and an assortment of cutters might be the only tool required for a lot of DIY projects. They can be arranged to follow various templates, create an abundance of different joints, in addition to creating simple or complex shapes in different positions on a particular work piece. And the router could even finish the entire thing off with elaborate engraving.

Woodworking Supplies Mesa by Timber Woodworking

Timber Woodworking offers hardwoods in Mesa, Arizona. We specialize in woodworking tools, equipment, and supplies for commercial woodworking cabinet shops or furniture manufacturers as well as the home shop hobbyist. Contact us today, or call if you should have any questions.

1 2 3 4