Woodworking Tools
Written by craig braddick

Using A Table Saw

The most expensive table saws, which range from $700 for a contractor-grade model to $300 for a standard model, are sold by the size of the blades they can use. Most table saws are 10 inches, which is the best size for most carpentry and woodworking jobs. However, 8-inch table saws are good for small jobs, and 12-inch table saws are great for making deeper cuts in thicker materials. The following are parts of a table saw:

When you use a table saw, be careful.

Too many amateurs and professionals have hurt themselves badly because they don’t know how to use a table saw. The material being cut can get stuck and kick back if it is not handled properly. This can either throw the material at the person cutting it at high speed or jerk it violently and pull their fingers toward the blade. Here are some things you can do to lower the chance of kickback:

Don’t turn on the saw if the thing you want to cut is touching the blade.
When you make “rip” cuts, you should always use the rip fence.

For crosscuts, you should always use the miter gauge instead of the rip fence because the rip fence doesn’t provide enough support.

During the cut, make sure the material is flat against the table.

Take the time to read the manufacturer’s safety instructions and make sure to always wear goggles and ear protection when using the table saw. This will help prevent kickback. Take the saw off the power before you adjust or align the blade, and don’t take off the safety guards that came with it.

Getting Ready to Cut

You can make dado cuts, compound angles, and rabbet joints with table saw accessories like clamps, stops, and jigs. But woodworkers mostly use the table saw for two basic cuts. The most common way to use a table saw is to rip, which means cutting things to a certain width. Crosscutting is a way to cut things to a certain length. The steps below will show you how to make each of these common cuts with a table saw.

How to Use a Table Saw

The rip fence on a table saw lets you make the easiest cut by adjusting to the width of the cut you want. It also acts as a guide to help you keep the material steady while you cut.

First, get the saw ready.


Take the table saw off the power and put a rip blade that works with the material you want to cut into the blade arbor on top of the table. Change the height of the blade so that it doesn’t stick out more than ¼” above the material you’re cutting. If you want to cut long pieces of wood from ½” plywood, for example, don’t raise the blade more than ¾” above the table.

To do this, loosen the arbor nut (the nut that holds the blade in place) with the arbor nut wrench that came with your table saw. Then, put the rip blade on the table saw so that the teeth face the front of the machine. From the top down, a table saw blade spins toward you. This means that the sharp blades should face the front of the table saw and not the back. Make sure the arbor nut is tight.

Step 2: Put the fence in place.

To set up the rip fence, first release the locking lever on the front of the fence. This locks the fence in place, and then slide it so that the inside edge matches the cut width you want. There is a ruler on the front of your table saw to help you set up the fence, but don’t use it alone to measure your cut. How far is it from the fence to the edge of the saw blade tooth that is closest to you? Use a precise tape measure. There are two sets of teeth on a saw blade. One set faces left and the other faces right. If you measure to the closest edge, you’ll know how much wood the blade will remove during the cut. This is called the kerf.

Step 3: Put the wood in place.

Place the material to be cut on the table saw so that it lines up with the rip fence. Do not let the material touch the blade until the saw is fully on and the blade is moving at full speed. Before the blade can start cutting, the material must touch it. This will definitely cause kickback.

Step 4: Move the wood through the saw.

Slowly but firmly move the material along the rip fence with one or both hands, depending on how much control you need to keep the material flat on the table top and in line with the fence. When ripping big, thick boards, you should usually start by guiding the material with both hands and then switch to one hand as the cut gets closer to being done. Always keep the material flat when you cut it if it’s long and goes past the back of the table. You can use a table extension to support it or have someone help you support it. Don’t let go of the material as you walk around to the back of the table saw. If you do, the material could lift off the table, which would make kickback more likely.

Step 5: If you need to, use a push stick.

If you need to keep your fingers away from the moving blade, use a push stick. When you’re making narrow rips that put your fingers just a few inches from the blade, a push stick is there to help guide the material. Always use a push stick instead of taking a chance.

How to Use a Table Saw

How to Cut in Half

It’s important to remember not to use the rip fence as a guide when cutting cross-cuts on a table saw. Long pieces are kept stable by the rip fence, but most crosscuts are made on thin materials, like when you cut something in half or remove the end of a board. When crosscuts are being done, there isn’t enough material to fit along the rip fence, so trying to use it increases the risk of dangerous kickbacks. Use a miter gauge instead.

A miter gauge has a bar that fits into one of the deep grooves on the table’s surface and a guide fence that keeps the piece stable. The miter gauge slides from the front to the back of the table saw when the bar is in a groove. This lets you control the cut. A guide that looks like a protractor can be adjusted by loosening a knob and then choosing the right angle before tightening the knob again. There are times when the miter gauge that comes with a table saw is a bit light. If you’re going to be crosscutting a lot, you might want to buy a stronger aftermarket miter gauge. You can also use a miter sled (see “Note” below).

1. Turn off the power to the table saw and put a crosscut blade in the arbor, just like in Step 1 of “How to Rip.”

2. Change the miter gauge’s protractor guide to make crosscuts that are either straight or mitered, which means they are at an angle.

3. Place the material along the front edge of the miter gauge and make sure it is straight. If you need to, use clamps to hold it in place.

4. Connect the table saw to the power and turn it on. Do not put any wood on the blade until it is spinning at full speed.

5. Put the material you’re cutting and the miter gauge together very carefully and slowly move them through the moving blade.

6. Turn off the table saw before getting things that were cut off close to the blade.

Important: You might want to buy an extra miter sled to help hold your material steady while you crosscut it. A miter sled looks like a shallow rectangular box with slots already cut out of the bottom. You can place the material inside the sled and then slide the whole thing over the table to cut. There’s no need for you to buy one, though. There are free, detailed plans online that you can use to make your own miter sled. You could use your new table saw to make a miter sled as your first project.

We specialize in woodworking tools, equipment, and supplies for commercial woodworking cabinet shops or furniture manufacturers as well as the home shop hobbyist. Contact us today, or call if you should have any questions.

Types of Saws
Written by craig braddick

The Best Ways To Use A Circular Saw

Best Ways to Use a Circular Saw Safely & Effectively 🛠️🔪

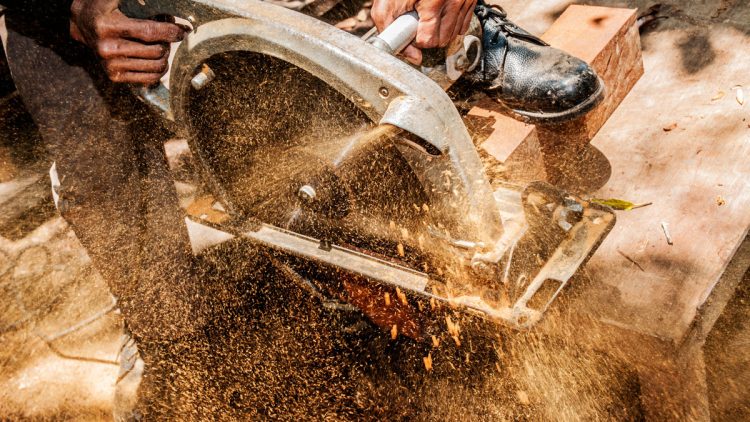
A circular saw is a versatile power tool used for making straight cuts in wood, metal, plastic, and other materials. Whether you’re cutting plywood, framing lumber, or trim, using a circular saw correctly ensures clean cuts, safety, and efficiency.

1. Choose the Right Blade

🔹 Standard Wood Blade (24-40 teeth) → Good for rough framing cuts.
🔹 Plywood/Finish Blade (60+ teeth) → For smooth, splinter-free cuts.
🔹 Metal Cutting Blade → For aluminum or sheet metal.
🔹 Masonry Blade → For cutting concrete, tile, or stone.

👉 Tip: Always use a sharp blade for cleaner cuts and less strain on the motor.

2. Adjust the Cutting Depth

🔹 Set the blade depth so it extends 1/4 inch below the material.
🔹 Too deep = more kickback risk & strain on the motor.
🔹 Too shallow = incomplete cuts & binding.

👉 How to adjust: Loosen the depth lever, set the blade, and retighten.

3. Use a Guide for Straight Cuts

📏 Best techniques for accuracy:
✅ Use a speed square to guide short cuts.
✅ Clamp a straight-edge or a guide rail for long, straight cuts.
Mark the cut line clearly with a pencil or chalk.

👉 Pro Tip: Cut with the good side facing down (reduces splintering).

4. Position Yourself Correctly

🔹 Stand to the side of the saw, NOT directly behind it (prevents injury from kickback).
🔹 Hold the saw firmly with both hands.
🔹 Keep the cord or battery pack out of the way.

5. Make the Cut Smoothly

✅ Start the saw before it touches the material.
✅ Let the blade reach full speed, then push forward steadily.
✅ Don’t force the saw—let the blade do the work.
✅ Use both hands until the cut is complete.

👉 Pro Tip: If the saw binds or stalls, stop immediately and check for pinching or improper depth settings.

6. Prevent Kickback ⚠️

🚨 Kickback happens when the blade binds, causing the saw to jerk backward.
🔹 Keep the saw moving smoothly—don’t stop mid-cut.
🔹 Make sure the material is supported on both sides of the cut.
🔹 Never lift the saw blade mid-cut—always complete the cut first.

7. Wear Proper Safety Gear 🦺

Eye protection (safety glasses or goggles).
Hearing protection (circular saws are LOUD!).
Dust mask (if cutting a lot of material).
Gloves (optional but can help with grip).

8. Maintain & Store Your Saw Properly

🔧 Keep the blade clean and sharp (dull blades cause rough cuts & more danger).
🔧 Check the cord, battery, and safety guard before each use.
🔧 Store the saw in a dry place to prevent rust.

Bonus: Advanced Techniques

📌 Bevel Cuts → Tilt the baseplate for angled cuts (great for trim & framing).
📌 Plunge Cuts → Start the cut in the middle of a board by tilting the saw forward.
📌 Track Saw Alternative → Use a guide rail for perfect straight cuts.

Final Thought:

Using a circular saw correctly & safely makes a huge difference in the quality of your cuts and prevents accidents.

Woodworking Supplies Mesa by Timber Woodworking

Timber Woodworking offers hardwoods in Mesa, Arizona. We specialize in woodworking tools, equipment, and supplies for commercial woodworking cabinet shops or furniture manufacturers as well as the home shop hobbyist. Contact us today, or call if you should have any questions.
Types of Saws
Written by craig braddick

The Differences Between Cabinet Saws and Table Saws

What’s the difference between a table saw and a cabinet saw?
Both cabinet saws and table saws are strong woodworking tools that can make precise cuts in wood and other materials. However, there are a few main ways in which they are different:

1. Building and Construction:

Cabinet Saw: These are built to last longer and be stronger. The motor is usually housed in a cabinet base that is closed off, which reduces vibration and noise. The trunnions, which hold the saw blade and control its movement, are usually attached to the cabinet. This makes the saw stable and accurate.

Table Saw: Table saws come in many shapes and sizes, but most of them have an open base or stand. They might not be as heavy-duty as cabinet saws, which could mean that they make more noise and vibration when they’re in use.

2. Performance and Power:

Cabinet Saw: Most cabinet saws have motors that are stronger than most table saws, usually between 3 and 5 horsepower. With this extra power, they can easily handle bigger jobs and tougher materials.

Tablet Saw: There are different motor sizes for table saws, with the smallest ones starting at about 1 to 2 horsepower. They can cut a lot of different things, but compared to cabinet saws, they might not be able to handle very thick or dense materials.

3. Accuracy and Exactness:

A cabinet saw is usually more stable and accurate when cutting because it is built to be heavier. Having the trunnions attached to the cabinet helps with alignment and cutting with more accuracy.

Table Saw: Table saws can be very accurate if they are set up correctly and have high-quality fences and miter gauges attached. However, they may not be as precise by nature as cabinet saws.

4. Price:

Cabinet Saws: These are usually more expensive because they are built to last longer, have bigger motors, and have extra features that make them better for professional use.

Table Saw: There is a wide range of prices for table saws, from smaller, less expensive models for hobbyists to larger, more expensive models for professionals.

5. Being portable:

Cabinet saws are usually bigger and heavier than table saws, which makes them harder to move around.

Table Saw: Many table saws are made to be portable, with stands or wheels that fold up and out of the way for easier movement.

There are pros and cons to both types of saws, and users should choose the right one for their needs, workspace, budget, and the type of woodworking they plan to do. Professional woodworking shops often choose cabinet saws because they are strong, accurate, and long-lasting. On the other hand, hobbyists and contractors like table saws because they are flexible and cheap.

Woodworking Supplies Mesa by Timber Woodworking

Timber Woodworking offers hardwoods in Mesa, Arizona. We specialize in woodworking tools, equipment, and supplies for commercial woodworking cabinet shops or furniture manufacturers as well as the home shop hobbyist. Contact us today, or call if you should have any questions.

Types of Saws
Written by webtechs

Types of Saws

Whether you are a I’ll fix it on the weekend, a woodworker, or a seasoned professional, the tools you decide to purchase can make or break a project. However, it’s not only about the tools—it’s about how they work out your biggest hindrances, make your workflow more streamlined, and help you produce improved craftsmanship.

In this guide, we go beyond just listing saws.

We are going to break down why these saws matter, how they are going to impact your work, and even what to look for when purchasing them—so you’re not throwing money away on the wrong gear.

Below are just a few of the types of saws

Keep reading to learn more!

Handsaw

“Basic” Handsaw This is the most identifiable and the simplest of all of saws to operate. It works on all types of wood but is best for “soft” woods. Can be used for making all types of cuts.

Hack Saw

This type of handsaw features a fine-toothed dispensable blade on a “C”-frame. It is commonly used for sawing plastics and metals.

Japanese Saws

This type of saw features a slimmer blade with ripped teeth on one side and crosscut teeth on the other. These saws are more typically found in making furniture or fine woodworking situations.

Coping Saw

This uncomplicated yet useful cutting tool comprises of a thin dispensable blade in a “C”- frame that utilizes exchangeable blades for both woods and metals. It can cut tight diameters; however, perhaps its most useful attribute is the ability to take the blade out and thread it through a pre-drilled hole to cut the inside profiles.

Jigsaw/Reciprocating Saw

If you have ever needed to cut a customized shape out of a sheet of plywood or possibly plastic, this is a perfect saw. If an ideally straight line is what you require, then leave this saw on the work shelf. Despite being in the hands of a knowledgeable woodworker the blade is going to drift easily.

Circular Saw

This saw is the go-to for making rip and crosscuts. If you purchase only one power-driven saw, this is the one. When it is combined with saw guides it can make shockingly accurate cuts.

Table Saw

Ripping and beveling are the things table saws do best. It can be safely utilized to miter and crosscut using jigs and other equipment. Typically, not very portable, its versatility makes this one of the most functional tools in a woodworking shop.

Band Saw

These are the best saws for cutting shapes in wood, plastics or metal. The bandsaw is a workhorse for props and making furniture. Comparable to jigsaws, band saws can also drift if you’re not paying close enough attention to the line.

Miter Saw

The best saw for cutting meticulous angles and basic crosscuts. Miter saws are ideal for cutting customized angles, making these perfect for moulding and trim work.

Oscillating Saw

Its vibrating blade is beneficial for precise cuts within restricted spaces.

*Don’t forget, few saws are particularly designed for cutting flesh and bone, but most can if the opportunity presents it. Keep it safe!*

Types of Saw Cuts

  • Rip cuts are cuts in the direction of the grain of the wood
  • Cross cuts are cuts that cut across the grain of the wood at 90°
  • Mitre cuts across the grain of wood different than 90°
  • Bevel cuts at an angle different than 90° along the thickness of the material being cut

Woodworking Supplies Mesa by Timber Woodworking

Timber Woodworking offers hardwoods in Mesa, Arizona. We specialize in woodworking tools, equipment, and supplies for commercial woodworking cabinet shops or furniture manufacturers as well as the home shop hobbyist. Contact us today, or call if you should have any questions.